Warning!
PrerequisiteFor this tutorial you will need the package API (fr.inria.plasma.packages) in its latest version or import Plasma Lab in its latest version as a library. This jar contains interface and shared class that you will have to implement and/or use.
You will also need the Java Simple Plugin Framework. Their web site is here but you can download it on our artifactory repository here.
Our plugin’s javadoc is here.
Error!
PLASMA Lab beta 1.1.9PLASMA Lab’s plugin architecture has been improved for our newest version. While the global mechanism and purpose stay similar to the previous versions, this tutorial is invalid since version 1.1.9.
Structure
A plugin is build around three main interfaces: Factory, Simulator and Checker.
- Given a model, the Simulator will generate execution traces of various length. These traces will then be checked against a set of requirement by the Checker. Our architecture page details their role in Plasma Lab.
- The Factory interface can be seen as the plugin entry point. It implements methods to retrieve the plugin’s name and description. But its main task is to instantiate the class which is implementing the Simulator or Checker interfaces.
A package also has to implement a State and Identifier interface respectively to represent a state of the model and elements of a state.
The API also comes with concrete classes to represent results and parser errors. These class can be found in the fr.inria.plasma.package.shared package.
Important!
Download the sources of this tutorial.Factory
First thing is to implement the Factory interface. For the purpose of this tutorial we will only uses one class for the Factory, Simulator and Checker interface.
The important thing to note here is the @PluginImplementation annotation. This annotation will tell the Java Simple Plugin Framework where to find the class it is looking for.
Important!
@PluginImplementation
public class DummyPlugin implements Factory, Checker, Simulator{
}
Then we have to implement functions of the Factory interface. These three functions shouldn’t need too much explanation, they will be used by the Graphical User Interface to display information about this plugin.
Important!
@Override
public String getPackageName() {
return “Dummy plugin”;
}
@Override
public String getPackageDescription() {
return “Plugin for the tutorial”;
}
@Override
public String[] getExtensions() {
return new String[]{“.dummy”};
}
As said previously, the main purpose of the Factory interface is to provide a way of accessing to a Simulator and a Checker without knowing them. This is done by implementing the next two methods.
Important!
@Override
public Simulator createNewSimulator() {
return this;
}
@Override
public Checker createNewChecker() {
return this;
}
In this example we return this because the DummyPlugin class implements the Simulator and Checker interface. In a real plugin, we will create new instances of out Simulator and Checker classes and return them.
And that’s it for the Factory!
Simulator
The Simulator interface uses two main methods, newTrace() and nextState().
- newTrace() instantiates a new execution trace and set it to the initial state.
Our dummy model language is a succession of “+” and “-“. Starting from 0 it will add or remove one to the current value. For instance the model “+++–” will produce the trace “0 1 2 3 2 1”.
Important!
@Override
public void newTrace() {
trace = new ArrayList();
identifiers = new HashMap();
identifiers.put(“#”, new DummyId(“#”, 0));
identifiers.put(“X”, new DummyId(“X”, 1));
state = new DummyState(0, 0);
trace.add(state);
FileReader fr = null;
try {
fr = new FileReader(model);
} catch (FileNotFoundException e) {
e.printStackTrace();
}
br = new BufferedReader(fr);
}
- nextTrace() returns the successor state of the current state.
Important!
@Override
public State nextState() {
try {
int c = br.read();
if(c==-1)
return state;
else{
double currentV = state.getAtPos(1);
double currentT = state.getAtPos(0);
if(c==’+’){
return new DummyState(currentT+1, currentV+1);
}
else if(c==’-‘){
return new DummyState(currentT+1, currentV-1);
}
}
} catch (IOException e) {}
return state;
}
There are others methods in this interface but they should not be a problem to implement. We will only take a look a the newTrace(int stepcount, double steptime) function. This method is called when Plasma Lab is set to the simulate mode and will generate a trace of a length equals to stepcount.
Important!
@Override
public void newTrace(int stepcount, double steptime) {
newTrace();
for(int i=1; i State next = nextState();
trace.add(next);
state = next;
}
}
At this point you should be able to run simulation of your model with Plasma Lab!
Checker
Notice
Coming soon.Deployment
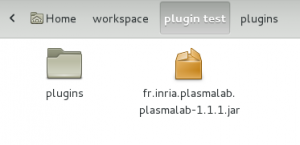
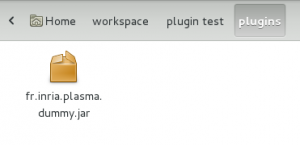
- Create a plugins directory next to the Plasma Lab executable.
- Put the jar plugin into this directory.
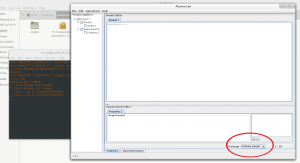
- Run Plasma Lab.


