This manual shows how to use the SystemC Plugin and the MAG tool in order to perform statistical model checking on SystemC models. Running the verification framework consists of two steps:
- Generating an executable model corresponding to the verifying properties with MAG tool,
- And using the SystemC plugin plugin to verify the properties.
Download
- Monitor and Aspect-advice Generator MAG 1.0
- Aspect-oriented Programming with C/C++ AspectC++ 1.2
- Patched version of SystemC in CHIMP 1.0
Installation
To compile and install MAG, AspectC++ and the patched version of SystemC, refer to the MAG user guide.
Generating Executable Model with MAG
In order to run the SystemC plugin to verify the properties, users first need to generate an executable model form the original SystemC model. It consists of three steps:
- Use MAG to generates the monitors and the aspect-advice file.
- Run AspectC++ with the generated aspect-advice file on the generated monitors and original model code to instrument the original model code.
- Compile (e.g., g++) the instrumented SystemC model code to produce the corresponding executable model
Users run MAG to generate the monitors and aspect advices according to the verifying properties as follows:
- Write the configuration file according to the verifying properties (see the MAG user guide for more details)
- Change to the directory of the MAG tool and run
Important!
mag -conf “configuration file”
- MAG generates three files: header and source files of the generated monitor, and the aspect advice file “aspect_definitions.ah” in the location defined in the configuration file
Users run AspectC++ with the aspect-advice file on the original model source code and the generated monitors to generate the instrumented SystemC model.
- Change the directory of AspectC++ 1.2
- Run the following command to generate puma.config file in the working directory
Important!
ag++ –gen_config - Copy the header and source files of the generated monitors and the aspect-advice file “aspect_definitions.ah” into the source directory of the original model source code
- For each header or source file of the SUV, run the following command to generate the instrumented version where “source_path” is the path to the source directory of the original model source code, “target_path” is the path to the directory where the AspectC++ puts the instrumented version, “systemc_path” is the path to the patched version of systemc-2.3.0 (included in CHIMP), and “aspectc_path” is the path to the AspectC++ 1.2.
Important!
ac++ -c “source_path/input_file” -o “target_path/output_file” -p “source_path” -I “source_path” -I “systemc_path”/include –config “aspectc_path”/puma.config
Compiling the instrumented model source code is done as follows:
- In the main header file , include the generated monitor header file, for example
Important!
#include “monitor_multi_lift.h”
- In the main source file, add the following line just before the call to sc_start()The parameters depend on the generated monitor, for example, in the included example of multi-lift system in the MAG tool package, it is:
Important!
mon_observer* obs = local_observer::createInstance(1, other_parameters);Important!
mon_observer* obs = local_observer::createInstance(1, &liftsystem);
- Compile the instrumented model source code with g++ compiler and link with the patched SystemC
We also provide the shell scripts in the example directory of MAG tool that automatically generated the instrumented model source code. User can modify them according to his configuration and requirements.
Running SystemC Plugin with Plasma
After compiling the instrumented SystemC model, an executable model is produced. Users then can verify the desired properties with the SystemC plugin of Plasma as follows:
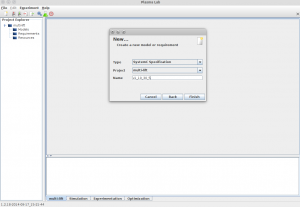
- Launch Plasma Lab with the SystemC plugin, create a new project, then create a new model of the type “SystemC Specification”. The content of the model is the path to the executable model
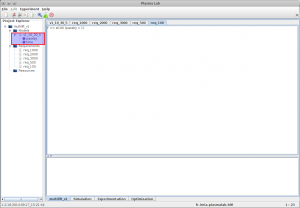
- Write the verifying properties based on the observed variables that are available in the executable model as shown in the following figure (inside the red area)
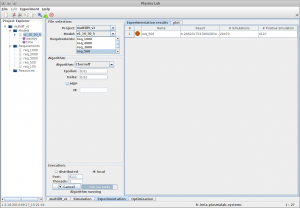
- Check the properties as usual with Plasma Lab


